VG 24/7: Alien Isolation Guide

News Feed

Well-Known Member
Oct 3, 2014
751
75
150
Your battle against the xenomorph begins here.

alien_isolation_guide_mission_1.jpg


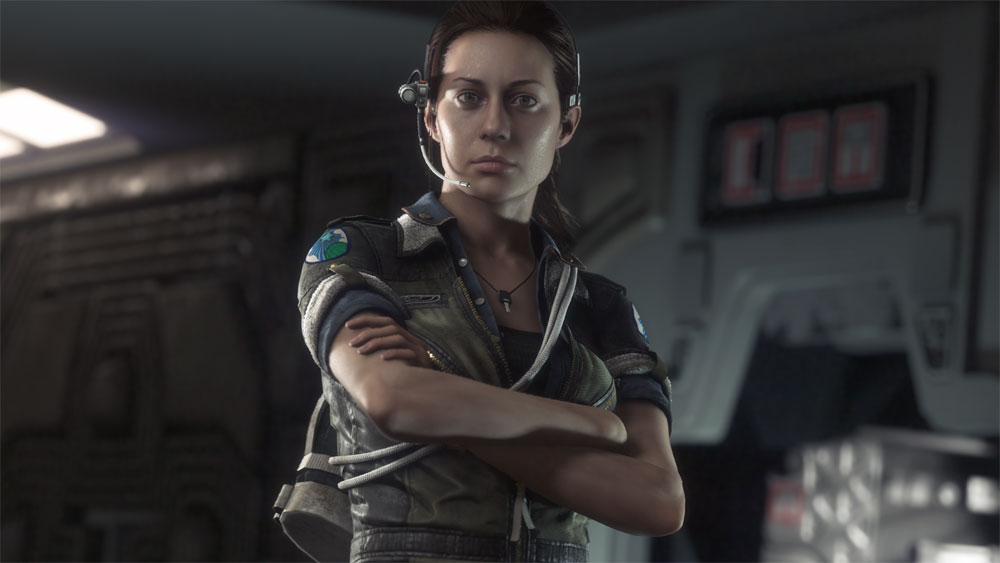
Alien: Isolation will have you assume the role of the iconic Ellen Ripley’s daughter, Amanda, whose wrinkled face you may have spotted if you picked up the special edition of Aliens. As Ellen floats through space in hypersleep, Ripley Jr. is starting a journey toward a close encounter of her own.

Alien Isolation guide mission 1: Closing the Book – Explore the Torrens


As soon as you’re handed the reigns, check in at the console on the wall with Amanda’s name above it, marked System Monitoring A, to get your objectives.

Get Dressed


Time to make yourself decent. Leave the area, take the first left along the corridor and follow the hall to the Bunk Room. Here you can take a shower and find Ripley’s locker across from the door, where her clothes are stashed. Pop these on to complete your first objective.

Speak to Taylor


Leave the Bunk Room and head back to the main corridor. To reach Taylor in the Galley, turn left and follow the hall to the intersection. Take the door to the right, follow this corridor to the end and into the Galley where you’ll find Taylor. Initiate a chat with her to complete the next objective. Note that on the wall in the Galley is a green light which you can interact with to pick up some items.

Speak to Samuels


Samuels is hanging out in the Med Bay, so leave the Galley via the route you came until you reach the intersection and head through the door on your right. Follow the corridor around, and the Med Bay will be the first room on your right. Speak to him to tick off the next objective.

Go to the Bridge for Briefing


After you’ve spoken to Samuels, you’ll be summoned to the Bridge. Follow Samuels, picking up Talor along the way, and listen to what Captain Verlaine has to say. When prompted, grab the briefing documents from the desk behind her to finish up the mission.

Head back to our Alien Isolation guide for the rest of the walkthrough.

Continue reading...
 
You’ve only just started. Mr Alien isn’t going to kill himself.

alien_isolation_guide_mission_2.jpg


Alien Isolation guide mission 2 – Welcome to Sevastopol – Restore the Power


Now you’re done with the first mission, you’ll need to get through the main door, find a way to distract the looters and reach the transit station.

Find Help


After you obtain your new objective, pop into the room next door for an outfit change, leaving your spacesuit in the aptly named spacesuit closet. Save at the Emergency Registration Space if you so wish, then move out to the corridor. Follow it down to the fiery hell pit, then look for an alternate route in the form of the ventilation shaft off to the left.

When you exit the shaft, a cutscene will trigger when you reach the hole in the floor ahead. Once this has finished, take a detour through through the luggage checkpoint, all the way to the end of the luggage carousel, to pick up some items. Now double back to the checkpoint and find the mechanism on the wall that will lower a ramp, allowing you to reach the ladder.

Scoot up here and grab the supply stash before leaving the room and heading up the stairs. Ignore the rooms for now as they’re not accessible yet. At the top of the stairs, take the map from the wall and attempt to exit the area via the shutter to prompt your next objective to appear.

Find a Way to Restore Power to the Shutters


There’s a control centre near Departures where you’ll find the 2000-KJVS Generator. Interact with it to restore power to the terminal. Read through the messages and restore the power to Departures. You’ll also find the code to unlock one of the rooms you passed by earlier (0340), so once you’re done here, head back and loot it immediately to pick up a Medikit Blueprint. The other 2 rooms are also now accessible so sweep those too, before moving out and heading through the shutter.

Make your way to the Spaceflight Terminal and up the stairs to the above platform, where you’ll spot the Torrens floating about outside. Time to make contact.

Contact the Torrens


Keep going and you’ll reach a flight of stairs heading down that will lead you to the Cred-Op Amusements arcade. Restore the power using the generator like the one back in the Control Centre, then leave the arcade and take the door to the left to enter Xing Xang Restaurant. Do a sweep of the room and use the Sevastolink terminal to glean a bit of background info on the goings-on at the station, then crawl back into the vents again which you can access behind the counter on the floor, to reach Baggage Claims.

Have Harold lend you a hand in clearing a path, then press forward until you reach a large door marked ‘42’. Your next objective is to get through it.

Get Through the Main Door


With the main door behind you, take the unlocked door along the left wall (there’s only one), and boot up the generator here. Head back to the main door and up the stairs to the left that lead to the Immigration and Security offices. Have a nose around these 2 rooms, then exit the Security Office, turn left and through the door into the next hallway. Check the room along here for anything you can add to your inventory before going back out and following the hallway to the Evidence Lock-Up at the end.

You’ll notice a corpse clutching a wrench just behind a fence and it looks mighty tantalising. Threre’s another vent in this area, so squeeze through, loot the body and crank the door open to leave once you’re finished up in here.

Before you complete the objective and use the Maintenance Jack on the main door, you might want to use it break in to the locked rooms to look for anything interesting. When you’re ready, open the main door.

Head to the Transit Link with Axel


Watch the cutscene unfold and simply follow Axel and his instructions to complete this objective.

Stay Close to Axel


Once you reach Axel’s hideout, your new objective is to be his shadow. Grab the torch and the batteries and let him lead the way to the vent.

Use Your Flashlight to Find the Vent Entrance


Another straightforward objective here, just use your torch, flash it over the vent entrance over in the left corner and pop through with Axel.

Find a Way to Distract the Looters


In the next area, sidle over to the cover with Axel and your objective will update to find a way to distract the looters. Move to the right and enter the room here to find a generator. Turn off the power and quickly enter the ventilation shaft via the floor hatch before the looters come in to investigate. After they leave, pop back out and get ready to get out of there.

Escape with Axel


Now that the looters have moved, run down the corridor they were initially standing next to and through the door. You can check the Sevastolink terminal here before moving on to the next room and your objective refreshes.

Hit the Power at the Same Time as Axel


Head back through the rooms you just passed through to reach the console that controls the power and follow the on-screen instructions. Job done.

Save Axel


Apparently Axel can’t be left unsupervised, so get back to him pronto and dispatch the looter that’s attacking him. This doesn’t go down well with the rest of the posse and they’ll all descend on the pair of you.

Escape with Axel (again)


Run after Axel like your life depended on it until the cutscene kicks in.

Reach the Transit Station


Head down the corridor to the right of the large vent splattered with blood and follow it to the Towerlink Transit System. In the right corner of the room is a button that will call the transit so run over, press this and wait for your ride. As soon as it arrives, jump on and mash the button for Lorenz Systech Spire to escape.

Head back to our Alien Isolation guide for the rest of the walkthrough.

Continue reading...
 
Security. But at what cost?

alien_isolation_guide_mission_3.jpg


Alien Isolation guide mission 3 – Encounters – Disable Security Lockdown


With the second mission out of the way, you’ll need to turn off the security systems.

Find an Elevator to Seegson Communications


Take the stairs to the left to find a number of doors that are all locked, bar one. Head through it.

Take the Elevator Up to Seegson Communications


Go up the next flight of stairs and prepare to duck and cover to avoid the sudden rain of gunfire. When the perpertrator has fled, you can take the opportunity to have a look around for various items before entering the door opposite the one that lead to this area and triggering a cutscene.

Find a Data Cell to Repair the Security Access Tuner


There are stairs to the right of where you picked up the Access Tuner, so take these, head around the balcony to the right and through the door the 4 women used to enter the area while trying not to get seen. Head down 2 sets of stairs and take the map from the wall, before going down another floor and through the Tech Support door.

There are some items stashed in the vent on the left here, so grab these before heading up the stairs and into the office. There’s a map outside, so be sure to take this off the wall.

Take the opportunity to save your progress in here, then take the Keycard and the Revolver from the desk and follow the corridor to the locked door that you can now open with the Keycard you just picked up.

Sweep the room for any decent supplies, then go down the corridor marked ‘System Monitoring’ where you’ll find another dead body ripe for the looting. Near this fellow you’ll find Flashbang Blueprints on the wall so be sure to grab them before doubling back down the hall and taking the door to the left to the Sevastopol Works Archive.

After the cutscene, look to your right and press the buttons in order from left to right (starting from the side with the crank). As you’re doing this, you’ll happen across the Data Cell. How fortuitous! Snatch it up to complete your objective.

Hack the Elevator to Seegson Communications


Let’s get out of here! To leave via the door you came through, you’ll need to use the Access Tuner. Once you’re out, go back down the corridor marked ‘System Monitoring’. You can use the Access Tuner to unlock the room off to the side here to find an audio log.

Make your way back to the room where you found the keycard and gun, and head down the stairs into the corridor marked ‘Tech Workshop’.

Disable Security Lockdown


Pull out the old Access Tuner to open the Tech Workshop door, sweep the room and check the Sevastolink Terminal. You can disable the lockdown from the desk in the middle of the room, but you can use your Maintenance Jack to unlock the other door in this room first if you’re feeling particularly paranoid. Once you disable the lockdown, you’ll trigger a cutscene after which it becomes very clear that you need to get the hell out of dodge. Right now.

Retrace your steps to the room you entered from the balcony to avoid being spotted by the 4 angry ladies from earlier, and use your Access Tuner to open the door. Once you’re in, hide immediately behind the railing and watch events unfold.

When the coast is clear, make your way down the stairs to the elevator (the spot where you picked up the Access Tuner). Use the Tuner to open the door, slip into the elevator and hit the button to end the mission.

Head back to our Alien Isolation guide for the rest of the walkthrough.

Continue reading...
 
Time for some sneaking.

alien_isolation_guide_mission_4.jpg


Alien Isolation guide mission 4 – Seegson Communications – Avoid Detection


Speak with the Android, go down the stairs and to the room at the end of the corridor. Take the Motion Tracker from the desk, then check the Sevastolink Terminal, open the Utility Folder and override the door.

Exit the room, head through the door on the left, and up the stairs through the door at the top. Across the hall here is a locked door that you can open with your Maintenance Jack. Search the room for anything worthwhile then pop next door and pick up the blueprint for the Noisemaker.

Continue on through the neighbouring rooms and you’ll reach a door that you’ll have to pull a lever to open. Give it a yank, go through and take a left, ignoring the stairs for now.

Find Another Way Inside


Use the Access Tuner on the door marked ‘Maintenance’ and after you’ve had a good poke around, it’s back into the vents for you! Follow the shaft to the end to complete the objective.

Gain Access to the Elevator. Avoid Detection.

Exit the vent to find another cadaver, and pop through the door next to it. Deactivate the camera in the corridor by using Access Rewire in this room. Now head back out to the hall, past the camera, through the Comms Control door and into the elevator here.

Contact Verlaine and the Torrens


There’s a map to the right of the elevator and a save point to the left. When you’re ready, take the door next to the save point, head up the stairs and toward the No Access Sign for some loot, then onwards to the Exteral Communications area to find the External Comms Link. When you’re finished here, it’s to the vents again. This will take you to the bottom level.

Find an Alternate Communications Terminal


After you exit the shaft, go right and look for another vent in the floor to the right of the desk. You’ll want to exit the vent before it veers to the left. Avoid the androids and head through the door to Internal Communications and the Monitoring Hall.

Turn right, follow the stairs down and through the Monitoring Hall. Carry on until you reach the Human Employee Recreation room to get the next update to your objective.

Reactiveate Samuel’s Communication


In this next room, exit via the door on the left, taking care not to be seen by the damaged android behind the counter. Head left down the corridor and into the room marked ‘Internal Communications’. Make your way to the centre of the room via the stairs and slog through the 3 mini-games for your next objective.

Return Through Seegson Comms to Escape


After the cutscene, pop through the door behind and to the right of you to save your game and find an EMP. Go through to the next room and enter the vent to the left of the door here. Follow the shaft to the end, hop out, and head straight back into another shaft to the right of the door in this room. This vent will deposit you in the corridor just outside of Internal Communications.

From here, make your way up the stairs, turn right and back into the Human Employee Recreations room. There are a number of android in here so use the Motion Tracker to avoid them. Leave the room via the other door, then go back through the Monitoring Hall the way you came, up the stairs and to the Comms Control area to the left.

Continue retracing your steps, back through the vents, all the way to the elevator. Hop in and select the Comms Security Surveillance area as your next destination. This will bring you back to the corridor with the deactivated camera. We’re still going backwards (all the way to the transit we used to escape the looters at the end of mission 2 in fact), so resign yourself to squeezing into more vents as you backtrack all the way to the Maintenance Room.

There will be an android patrolling the corridor, so take care to avoid it while heading to the Human Employee Recreation room to the right. Go through here, into the hall and follow it around to the opposite door, then head to the Reception area.

Take the stairs down (passing by where you found the Motion Tracker), and go left, backtracking to the point the mission started. Use the Motion Tracker and Noisemaker to avoid and distract the androids as necessary before making a break for the elevator and taking it to the Lorenz Systech Lobby.

Take Transit to Scimed Tower


Sneak your way out of this room through the door opposite the elevator, with a ‘Transit Station’ sign above it. Go right down the corridor into the Towerlink Transit System. Pop down the stairs and go left, making your way towards Towerlink 01. The transit is already on its way so sit tight, avoiding any altercations until it arrives and whisks you away to Solomons Habitation Tower.

Upon leaving the transit, you can save your game to the left and have a nose around before boarding Towerlink 03 which will take you to Scimed Tower, completing this objective and the mission.

Head back to our Alien Isolation guide for the rest of the walkthrough.

Continue reading...